
.jpg)
 7 hours ago
3
7 hours ago
3
PROTECT YOUR DNA WITH QUANTUM TECHNOLOGY
Orgo-Life the new way to the future Advertising by AdpathwayAuthor by Amanda Davis on September 22, 2026 Updated on September 22, 2026
Use sun print paper to create wonderful wall art! This is an awesome project for kids to make and give as gifts to grown ups! Adults will love playing with sun print paper too!
Use items from nature to create beautiful sun print wall art! This project is quick and easy, and the transformation is fun to see.
Sun Print Wall Art
Ever since I was a kid I have loved using sun print paper. If you’ve never tried it, you really should. There’s a chemical reaction that takes place on the paper after it’s exposed to sunlight. Running the exposed sun print paper under cool water causes another reaction that gives you a beautiful end result that’s worth framing. The best part is this is a craft project kids can make and give to adults. Wonderful wall art that looks stunning.
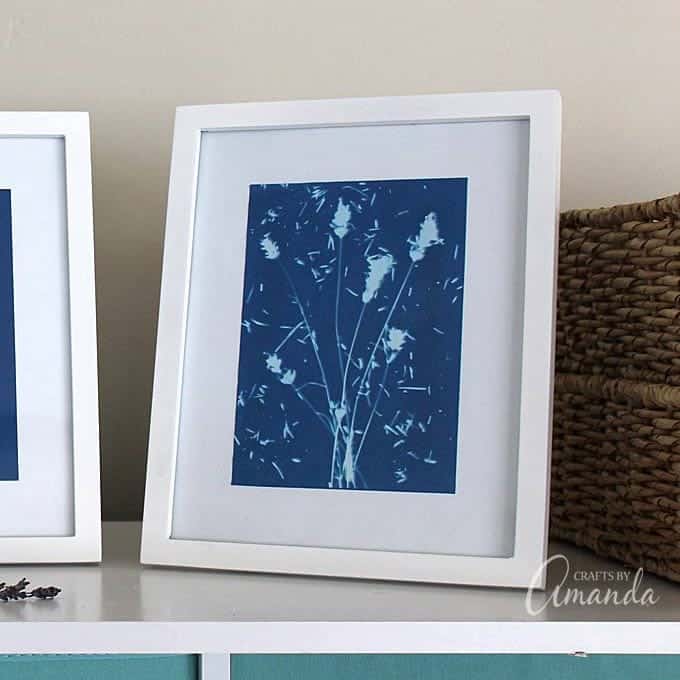
You can use items from nature such as plants, leaves, flowers, or in my case, lavender. You will definitely need a sunny day, but only a couple of minutes in the sun are needed. Kids will be amazed by the sun print paper’s transformation once it hits the water. The whole process, from start to finish takes less than ten minutes, not counting drying time of course.
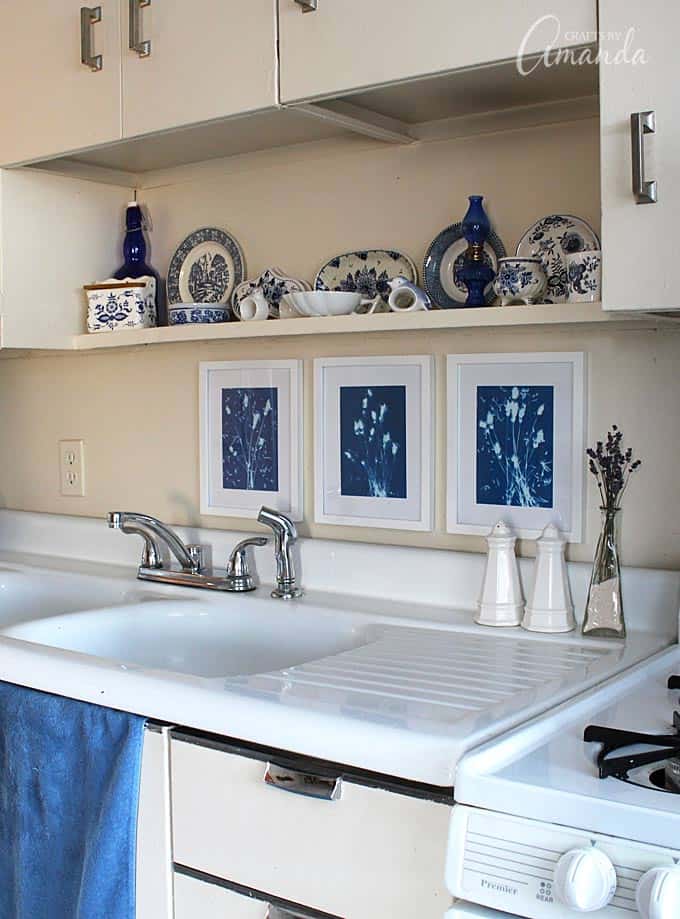
The results are stunning and absolutely gift-worthy. Kids will be so proud to see their sun print creations displayed on the wall or shelf!
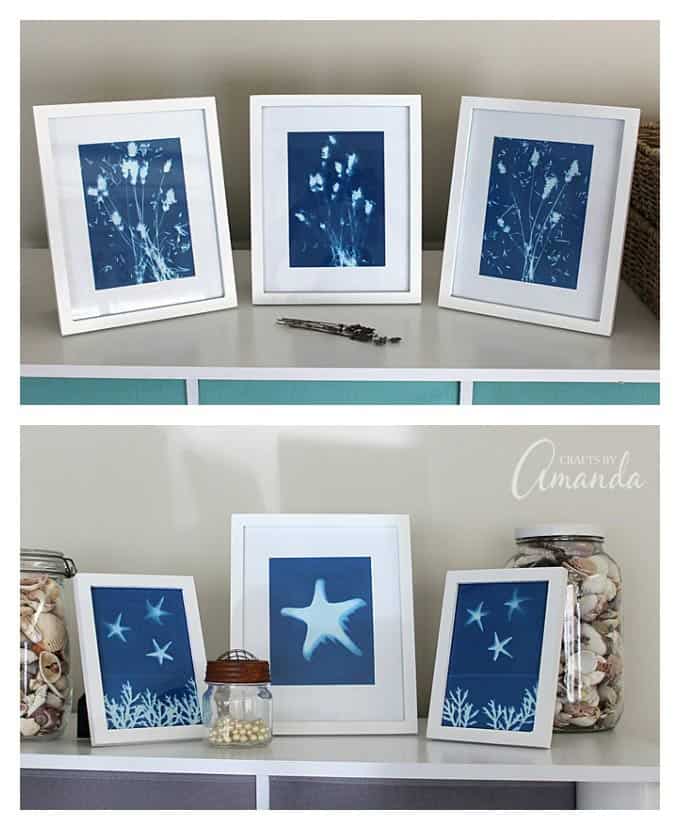
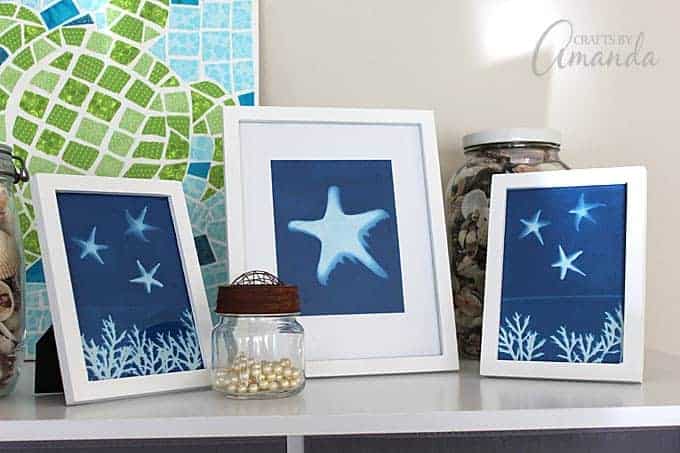
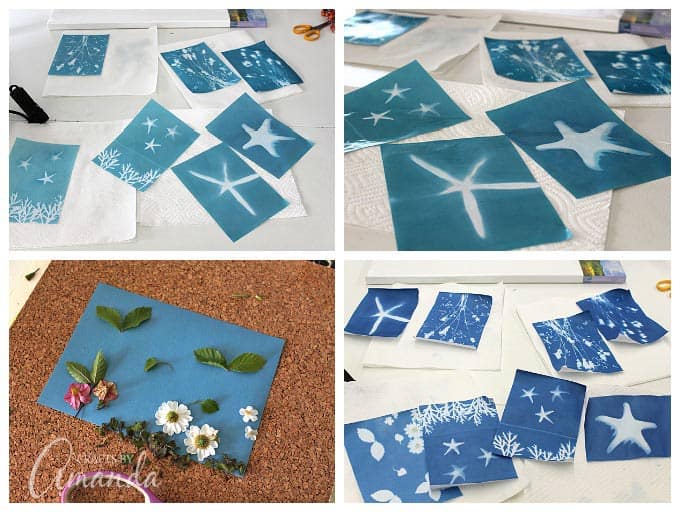
You can use any objects you like: starfish, coins, keys, cookie cutters, sticks, anything you can think of. I used different sized starfish and a few clippings from my flower box to make the coastal framed sun prints. The shadow that was cast from the starfish also shows in the final result.
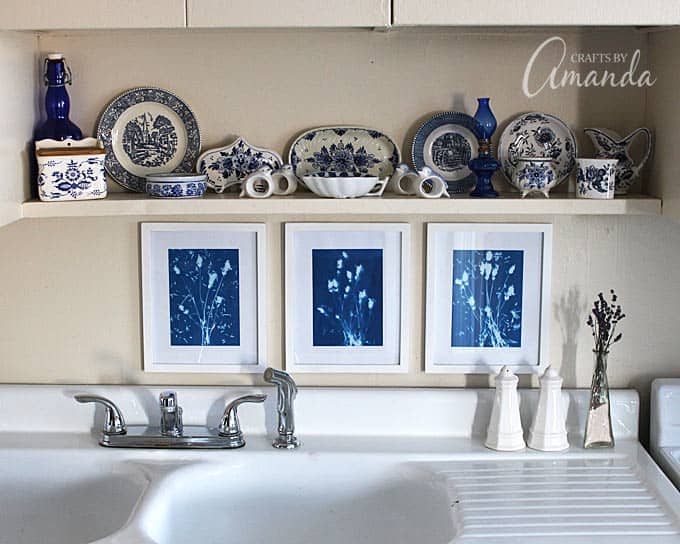
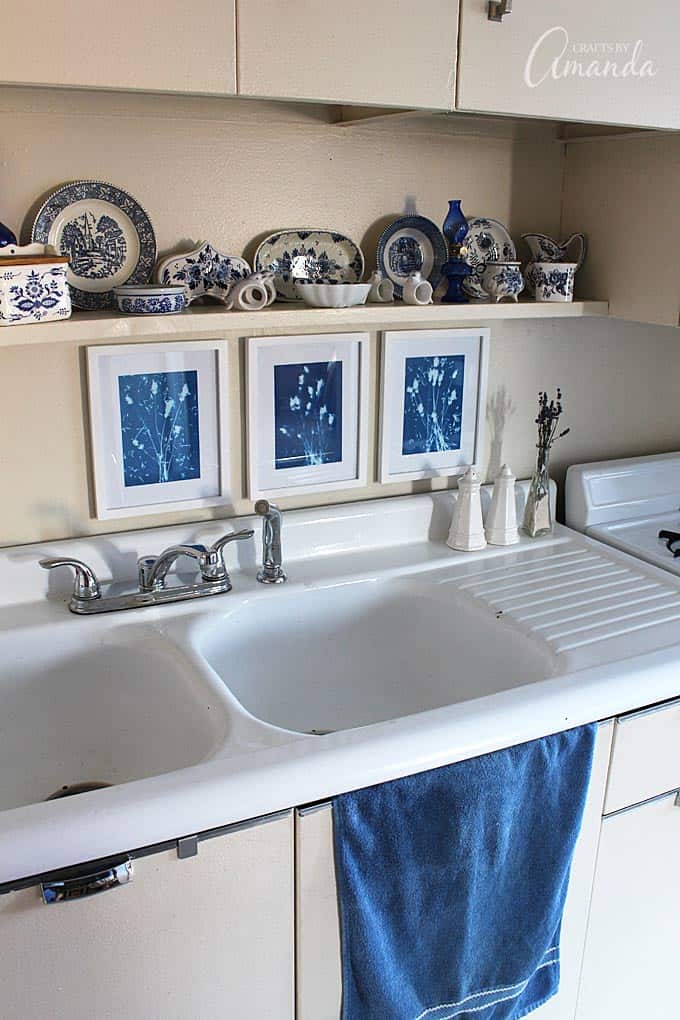
So if you’re looking for a unique gift that the kids can make, or just a unique project to keep and display, sun print wall art is a great option! I bought the white frames from WalMart for $6.00 each and simply used a glue stick to attach the sun prints to plain white paper instead of buying expensive mattes.
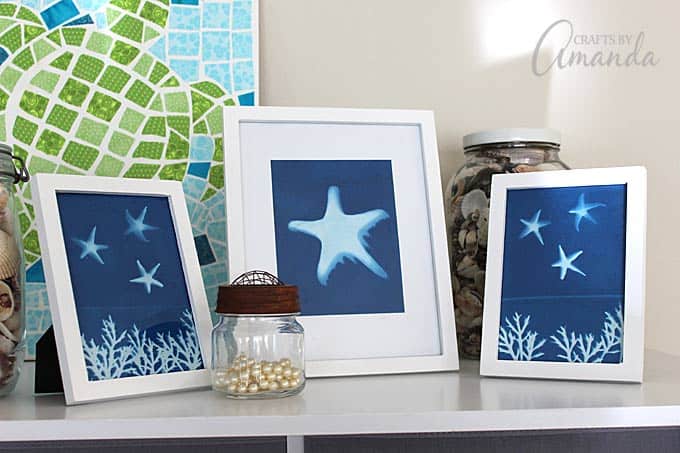
Sun print paper is really easy to use. The most important thing is having a sunny day. Clouds won’t allow the same results as full sun. Windy days can make it tough too, which is why I used a piece of glass over my designs. The package will tell you to pin your paper to cardboard, but if there’s a slight breeze your lightweight objects will be easily blown off.
Supplies you will need
Find the full printable list of materials and instructions at the end of this post.
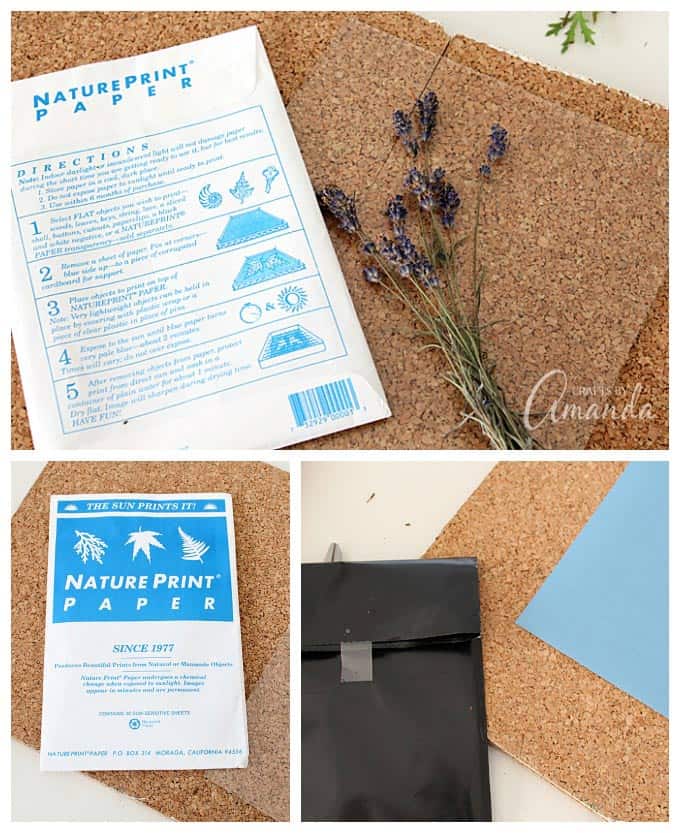
- 5″x7″ sun print paper*
- Objects of your choice (in this tutorial: lavender, starfish, plants)
- 13″x9″ or larger pan with an inch or so of cool tap water
- Foam core or a piece of cardboard
- Paper towels
- Clear plastic or glass (use one from a frame)**
- White frames
- White paper
- Glue stick
*Sun print paper comes in different sizes and contains multiple sheets. I used the 5″x7″ size for this project. The paper is stored inside a black packet to keep it from being exposed to light. Only remove it from the packet when you are ready to start.
How to Make Sun Print Wall Art
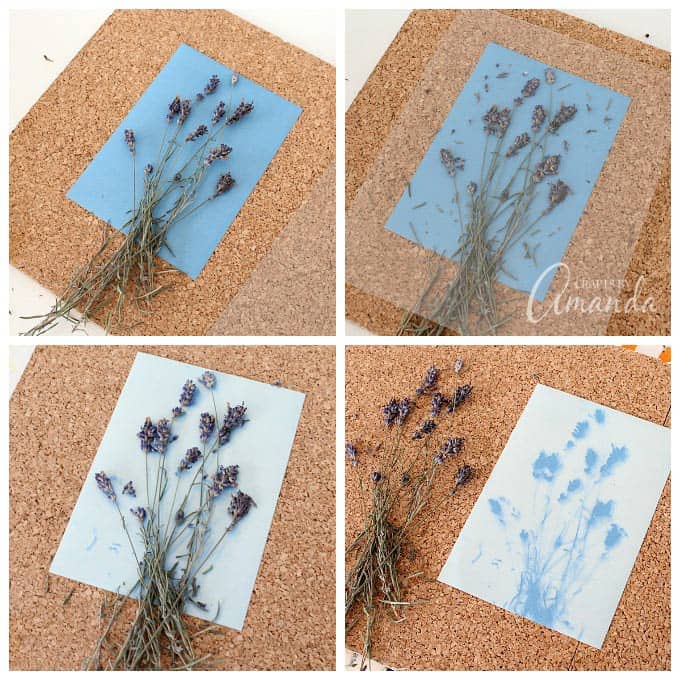
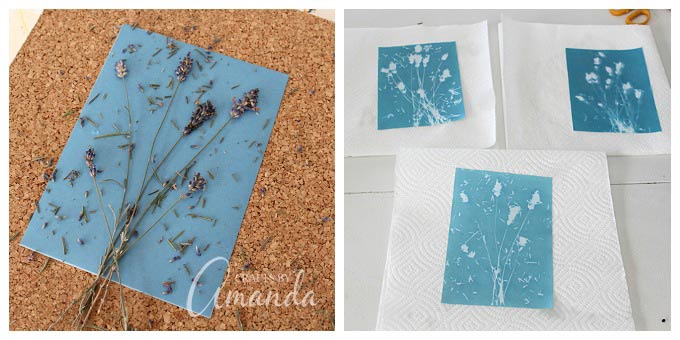
- Place a piece of sun print paper, blue side up, onto your foam core or cardboard.
- Arrange objects on top of paper.
- Cover objects with glass and press down to hold everything in place, especially if it’s breezy out!
- Expose to direct sunlight for two minutes.
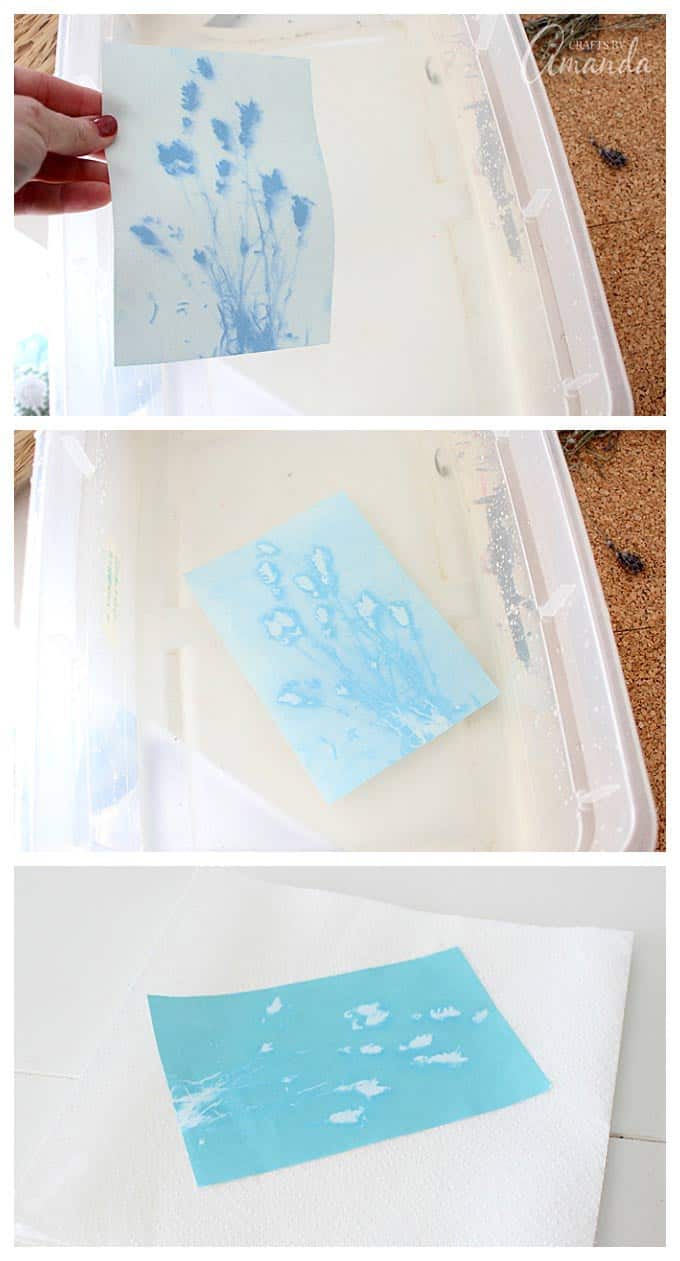
- Remove glass and objects from paper. You will see that the paper has lightened in color and the areas under your objects will be the original blue.

- Submerge exposed paper in pan of water.
- Be sure it’s completely covered and leave in water for about one minute. The blue areas will turn white, and the light areas will turn light blue.
- Remove paper from water and place on paper towels to dry. The blue areas will darken as the paper dries.

- You can even add tiny elements to the paper like I did here. You can see that along with the lavender I sprinkled on some of the crushed petals and leaves.

- Feel free to use all sorts of different objects to create the look you want.



A Few Tips
- Some objects, such as my starfish, are too bulky to cover with glass. You can cover them with plastic wrap if you have smaller bulky items that may blow away. My starfish weighed enough that I did not need to worry about them. If an object does not sit flush with the paper due to variations in its shape, such as the larger, skinnier starfish, sunlight may get underneath and expose areas of the paper you didn’t want exposed. It can still create a cool effect!
- The line that appears above the plants with the small starfish was from me placing the glass over the plants but not the rest of the paper.
- If using flowers, place the flowers face down on the paper. Because flower petals are thinner that the center of the flower, the petal areas will produce a different result that the rest. Just experiment and play around with different objects and their placement.
- **Check the edges of the glass to make sure they aren’t sharp. Cover edges with painter’s tape if children will be handling directly. Painter’s tape can easily be removed when project is finished.
This would also be a wonderful project for seniors going through rehabilitation, or those in a nursing home. It’s fun and relaxing and the finished product is truly a work of art. If you’re looking for other projects, here are more than 30 canvas ideas to choose from, and be sure to check out my Crafts by Amanda Craft Kits!
More Wall Art Projects
Sun Print Wall Art
Use sun print paper to create wonderful wall art! This is an awesome project for kids to make and give as gifts to grown ups! Adults will love playing with sun print paper too!
Author: Amanda Formaro
Supplies
- 5 “x7” sun print paper*
- Objects of your choice this tutorial: lavender, starfish, plants
- 13 “x9” or larger pan with an inch or so of cool tap water
- Foam core or a piece of cardboard
- Paper towels
- Clear plastic or glass use one from a frame**
- White frames
- White paper
- Glue stick
Instructions
Place a piece of sun print paper, blue side up, onto your foam core or cardboard.
Arrange objects on top of paper.
Cover objects with glass and press down to hold everything in place, especially if it’s breezy out!
Expose to direct sunlight for two minutes.
Remove glass and objects from paper. You will see that the paper has lightened in color and the areas under your objects will be the original blue.
Submerge exposed paper in pan of water.
Be sure it’s completely covered and leave in water for about one minute. The blue areas will turn white, and the light areas will turn light blue.
Remove paper from water and place on paper towels to dry. The blue areas will darken as the paper dries.
Expert Tips & FAQs
*Sun print paper comes in different sizes. I used 5″x7″ for this project. Sun print paper comes in packs for multiple projects. The paper is stored inside a black packet to keep it from being exposed to light. Only remove it from the packet when you are ready to start.
**Check the edges of the glass to make sure they aren’t sharp. Cover edges with painter’s tape if children will be handling directly. Painter’s tape can easily be removed when project is finished.
This post originally appeared here on Nov 12, 2015.
Amanda Davis is the crafty, entrepreneurial mother of four children. She loves to bake, cook, make kid's crafts and create decorative items for her home. She is a crafting expert and guru in the kitchen and has appeared online and in print publications many times over the years.
Latest posts by Amanda Davis (see all)
Reader Interactions
Free CraftsBy email every week
Latest crafts straight to your inbox!








 English (US) ·